Oveit lets you launch a fully cashless payment system for your events—no expensive hardware required. Simply use NFC-enabled Android smartphones, NFC tags (wristbands or cards), and an internet connection. The Oveit Pay app transforms your regular phone into a fast, secure point-of-sale terminal.
How the Mobile Cashless System Works #
-
Create Your Event
Set up your event in Oveit and sell or import tickets as usual. -
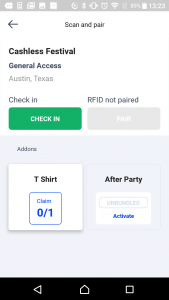
(Optional) Check In & Tag
With the Oveit Pay app, scan each ticket to check in your attendees and link their ticket to an NFC wristband or card. Very important: pairing tickets and cards is optional but using the linking options you can get loads of data into guest behavior and purchases -
Enable Purchases
Once the NFC card or wristband is activated, attendees can top up credit and buy onsite items using their wearable.
#
1. Set Up Top-Up Points (Cashiers) #
Top-up points let attendees load funds onto their wristbands.
-
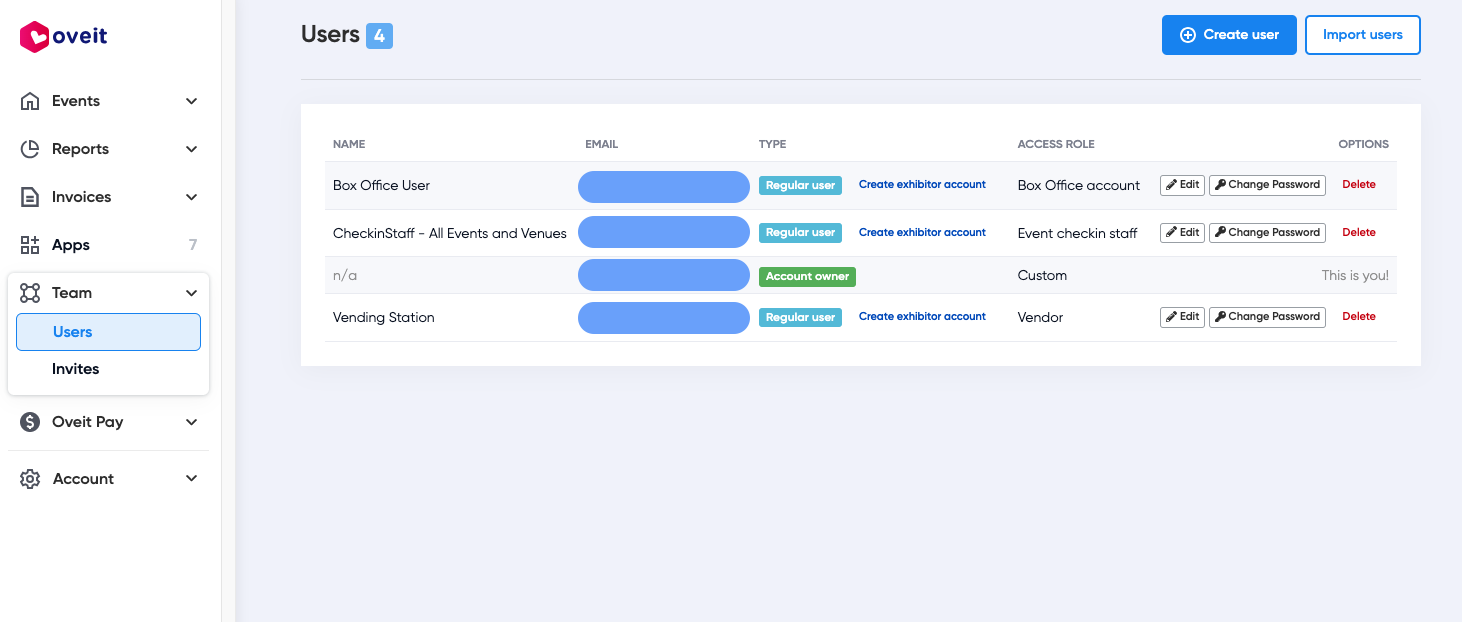
Invite Cashier Users
-
Go to Dashboard > Team and click Create User.
-
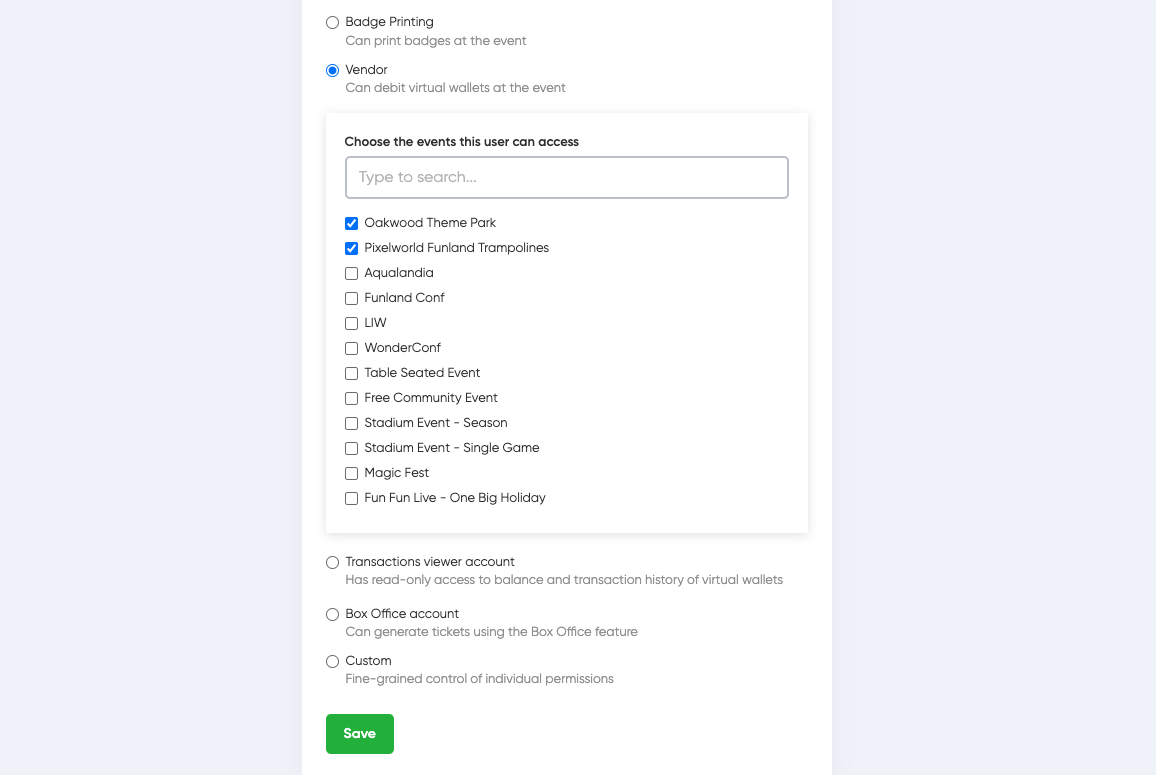
Grant the Top up point permission so they can add credit.
-
When selecting the permissions make sure to check “Top up point” so that the new user will be able to top up credit for your attendees.
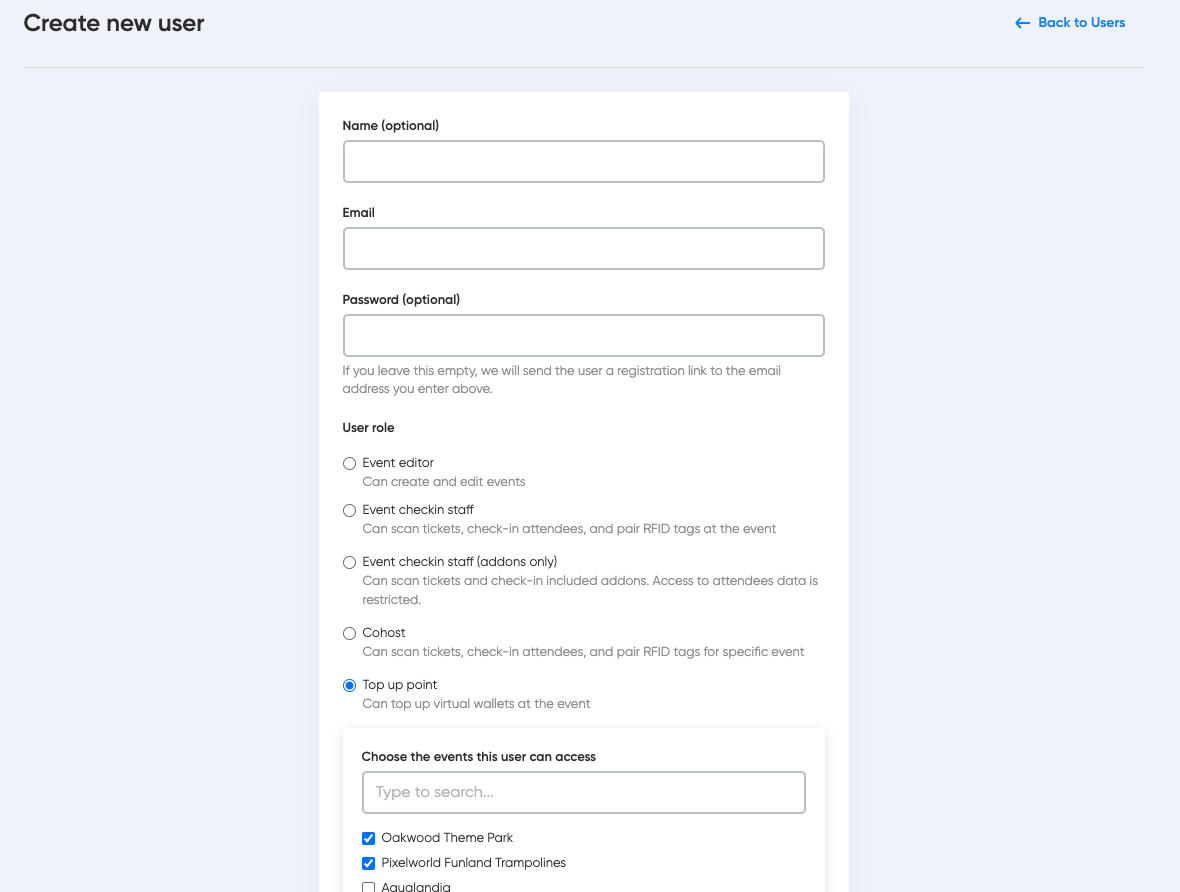
Enter the email address (it’s the username for your new account) and the password; the name is optional.
Next steps:
-
Log In to Oveit Pay
-
Use the new cashier’s email (username) and password.
-
Tap the phone against a wristband to open the Add Credit screen.
-
-
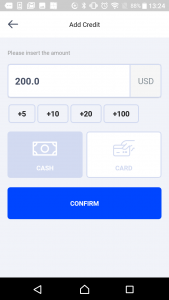
Add Credit
-
Enter the amount, choose Cash or Card, then confirm.
-
The attendee’s wristband is now loaded and ready to spend.
-
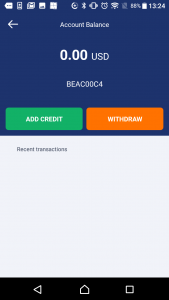
Select “Add credit”, enter the desired amount, select payment method (Cash or Card) and Confirm. Attendees are now ready to pay using the NFC wristband.
2. Onboard Vendors #
Vendors sell products directly through the cashless system.
1. Invite Vendor Users
Use the same Invite User flow, but assign the Vendor role.
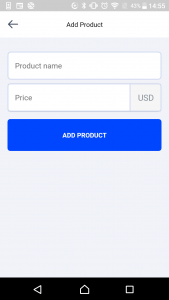
2. Add Products
-
Log in with vendor credentials in the Oveit Pay app.
-
Enter each product’s name and price. (You can also pre-load products in Oveit.com—POS will sync them on first login.)
3. Process Sales
-
Scan the attendee’s wristband to display available products.
-
Select items and press Continue.
-
If an attendee’s balance is insufficient, the app shows an Insufficient funds alert.
-
-
Tap the wristband again to confirm the sale.
-
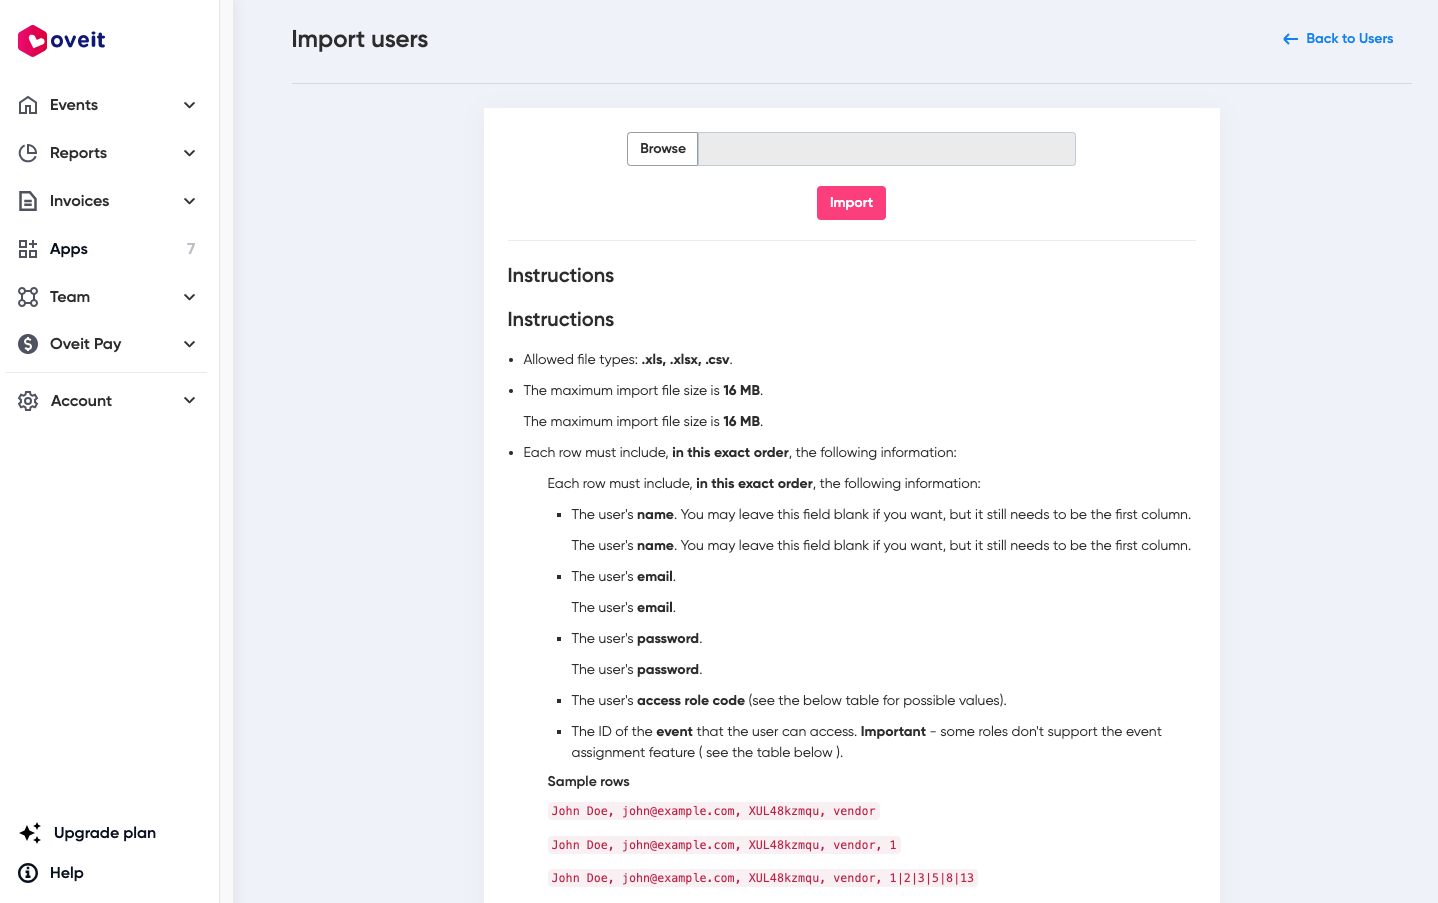
(Tip: Import large user lists at once to speed up setup.)
Tap the card to enable the menu to pop-up:
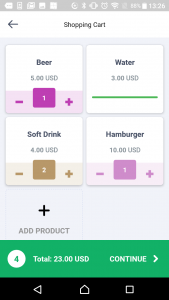
After you hit “Continue” the list of products and the total amount will be displayed on the screen.
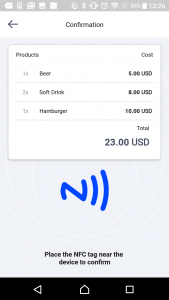
Tap the client’s wristband one more time to confirm the transaction.
p.s. Don’t worry if you have hundreds of users. Our system allows you to easily import them as a list.
#
3. Withdrawing Remaining Funds #
After your event, cashiers can refund unused balances:
-
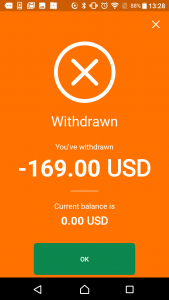
Tap the attendee’s wristband once to select using the NFC scanning on your mobile device. On your screen, in the balance section, tap the Withdraw button. In the confirmation screen, tap the wristband again to confirm the payout.
As you can see, setting up a cashless payment system has never been easier. And the best part is that the same cool wristband can be used for more than just payments, taking you one step closer to that “perfect event” that we all crave for.
Contact us for more info about our NFC technology for events.


