We’ve always encouraged you to create customized experiences for your attendees. But in order to do so you need the right tools, right? This is what we are building here at Oveit – tools for live experiences, whether we are talking about selling electronic event tickets, NFT ticketing, or implementing cashless payments for your festival or venue.
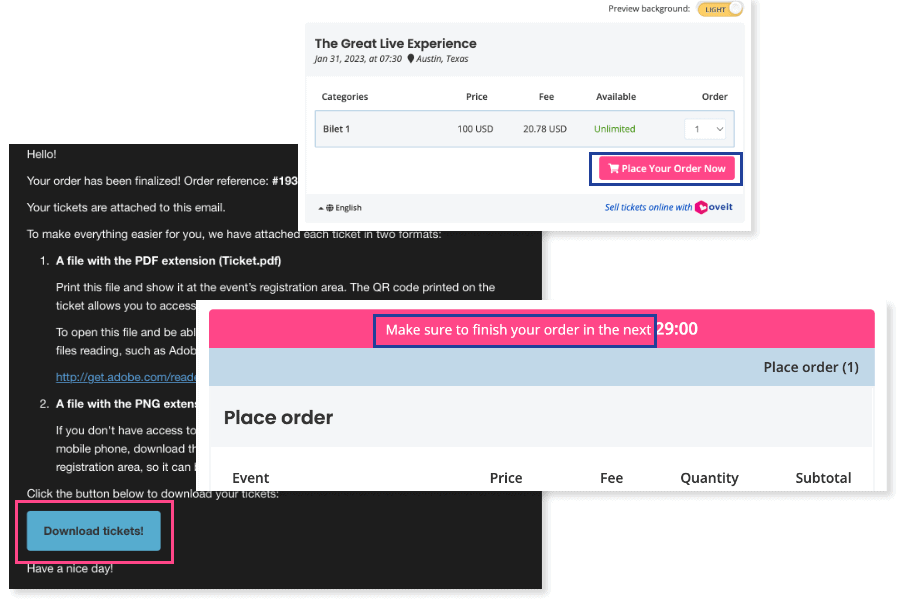
Today I want to show you one of our latest updates. The one that allows you to display your own Call To Action during the registration process. Whether you are selling traditional electronic tickets or have opted for NFT ticketing, you can now input your own CTAs during the registration process.
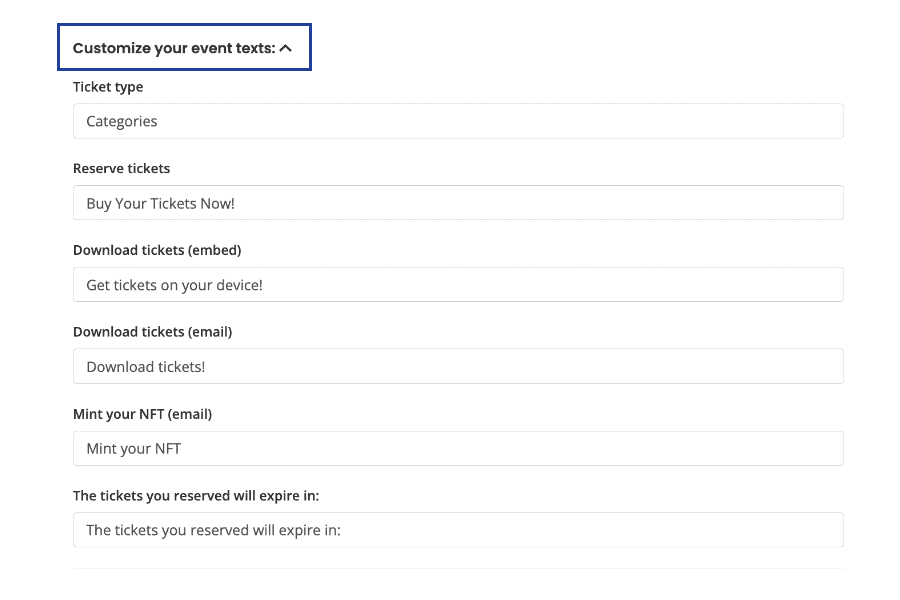
Customize your event texts
Available in Step 3 – Checkout settings for PRO PLUS accounts, the step where you’ve always customized the follow-up emails, this new feature allows you to change your Ticket Texts for your embeddable registration widget, on the confirmation page generated by Oveit, or/and inside the confirmation email.
Your tone of voice is what your community reacts to. And this new update will allow you to customize the experience deep to the smallest, yet not unimportant, details.
Looking to test this new way of engaging your audience? Log in and give it a go. Or schedule a call to learn more about how to deliver better attendee experiences.
With Oveit you can create advanced Ticket types. The first thing you do is set your ticket type name. You can set names such as VIP Area, Entry ticket, Early bird ticket etc. Obviously, the ticket type name is your choice and varies according to the events. You might want to create special prices for different areas in your venue, so you can name one ticket type Area A and another Area B. Again, this is your choice to make.
Now, you can make a short description of the ticket (300 characters). Here you can add information about the ticket that might be relevant to the attendee. This is optional but sometimes it’s a good thing to have, as you might want to offer the attendee some extra features on that respective ticket. Or it may be a multiple day pass for a larger event and the description can indicate the events where he is allowed to participate.
Next is the ticket price. You can set up the ticket price in USD or other, local currencies. Nevertheless, if you enter the ticket price “0”, that means the event is free of charge and you can go on using Oveit just as a registration tool for the attendees.
After you set up the price, you can tick an option to include the sales fees in the final price, or opt to add it to your ticket price. You will see the buyer’s final price (and our fee) and you will see how much you will receive in the end.
You will see a Bulk sales options bar. This is a nice feature in case you want to create special offers for a specific ticket category. Let’s say that your ticket price is 20 USD. Now, you can make a special offer and sell 2 tickets for the price of one. Just select: 2 tickets cost 20 USD. And the offer is active. Simple and fast. Of course you can include our processing fee in the price or add it, just like in the case of normal tickets. And you can also add more promotions: 5 tickets cost X USD, 10 tickets cost X USD… and all the way to 15 tickets. If you want to remove a bulk sales offer just click delete and you’re done.
Next you can set up the timetable of the sales for this ticket type. Set the starting date and hour for the ticket sales and set the closing date and hour. If you want to sell this type of ticket until the event day, just leave the fields empty and Oveit will set it up automatically.
You can customise your event ticketing process by setting specific Series and Numbers for the tickets, if you wish to do so. Otherwise, just let Oveit work its magic and generate the ticket ID’s automatically. Save the ticket and proceed. You can add more tickets, edit your created tickets and associate the tickets with the event venue.
If you’ve previously set up a venue seating chart, you can associate the tickets you’ve just created with a certain seating section, row or seat. Once you click on the Associate Tickets you will be taken to a new window where you will see the seating chart of the venue that you’ve previously created. To associate tickets with seats is extremely simple. Just click on the ticket type and then click on the seat section… and that’s it. If you want to block some areas of the seating chart, just click on ‘Unassociated’ and then on the respective area, and it’s blocked. You can do that while sales are going on, as you might want to change ticket prices or you might want to assign some seats to other categories or even give invitations/vouchers for those seats. So with just a couple of clicks you can do your seat management on the fly with this Assign seats function.
That’s it. How are you going to use the advanced ticket types?
Last week was a full one for us here at Oveit; on Wednesday we visited the lovely city of Riga to participate at We are Museums event WAM 2017 – Tech loves Culture, where we met many museums professionals eager to use #tech to offer their customers a better experience; Thursday and Friday were reserved for ICEEfest, Interactive Central & Eastern Europe, one of the biggest tech-related events in Central & Eastern Europe. At ICEEfest we were in charge with the registration process and also implemented the cashless payment system, offering attendees the possibility to pay using their wristbands. Everything went as smooth as it can so we thought that would be nice to share some insights that can help you to implement this cashless payment method for your next event.
Here are some hints for a better workflow:
Use the right tool, so you don’t have to use 2 of 3 different software products for one event (our friends used Oveit to sell tickets, check in attendees, print badges and set up the cashless payment system). We used our software “as a hole” and made it really easy to associate the NFC wristbands to an attendee and credit his/her account.
Test your hardware. For this event, we used 24 laptops, 10 NFC readers, and 6 thermal printers. It all worked well but you can be sure that we didn’t wait for the first guests to arrive before we (individually) tested every piece of hardware that we were going to use for the big event. We checked and double checked so when the guests started to arrive we knew that everything is in place and any malfunction that may occur can be easily fixed.
Make sure you have enough power supplies and a strong internet connection (it is strongly recommended to use a private network for your apps, different from the one used by your guests).
You will need to host 2 different training sessions for people operating the software: one with the cashiers (that will credit your attendees’ accounts) and one with the vendors. It’s incredibly easy to use the NFC cashless payment system (at least ours is) but you must make sure that everyone knows how to use it (don’t assume that they don’t need to test it first).
Have a crew on site that knows how to use the software and can be of help if needed. If you have access credentials for each selling point it would be best if the “guys on sight” have the ability to reset them (they are there as a backup, to fix any problem that may occur). If someone has trouble remembering how to log in (or what’s the correct password) – they will have someone to ask for help. You use NFC to improve the general experience so make sure that you have someone on site for this sort of problems.
Conclusions
Using cashless payments was a bliss; there were attendees from all over the world at ICEEfest, so you understand why using cash would’ve been a problem. First, not everyone had the time to stop by an ATM and withdraw cash; second, the queues would’ve been huge with hundreds of people trying to figure out which bills to use. This system allowed everyone to use their credit/debit card to top-up their accounts and a simple tap for pay at all the 8 stores available on site. The result?
A payment system that was very easy to use and no more queueing.
If you still have doubts about the NFC technology and how it can help you offer a better experience for your attendees I encourage you to read this article, where you will find (almost) all the right reasons :).
We use cookies to ensure that we give you the best experience on our website. If you continue to use this site we will assume that you are happy with it.AcceptPrivacy policy