How to start event registration for virtual or in-person events in 2022

Let’s say you want to start event registrations for your virtual or in-person event. You’ve decided to use an awesome event registration software, Oveit . But now the big question – how to start event registration?

First of all, thank you for choosing us. This is going to be as easy as it can get. At the end you will start registering visitors free of charge and receive payments in your account instantly.

If you need a video tutorial, we made one you can see below. Otherwise – keep on reading this post.

Let’s get started.

A checklist on how to start event registration

The first thing you will see when you start your account with Oveit is a short checklist with the things you need to do before starting registering visitors to your event.

It looks like this:

How to start event registration checklist
A checklist on how to start event registration with Oveit

There’s basically 3 things you need to do to start your event registration. They are the things you see above:

  1. Set up billing information: this is your company or individual details. Oveit is a special software that allows you to sell tickets directly to your customers. This means they will need to know who they’re buying things from. This is the section where you’ll be setting this information in. Don’t worry – you only set it once.
  2. Set up a payment processor: A payment processor is a company, like PayPal and Stripe that helps you receive payments instantly, directly into your account. If you have a PayPal, Stripe or Crypto account, this is where you set it up. This is a very important part of how to start event registration, if you’re planning to receive payments for your event.
  3. Create an event: This part is self-explanatory. You will have to enter some details about your event, like name and the date it takes place in, set up tickets and share the registration link with your potential visitors.

As you notice above, there’s a fourth step as well. This is the “select pricing plan”. By default, Oveit automatically registers you with the free event registration plan, which allows you to register up to 300 visitors per event, on an unlimited number of events, free of any Oveit charge. If you receive payments, you will be charged a commission by PayPal or Stripe.

If you checked all details above, you’re basically set and you know how to start event registration for all your next events.

However, Oveit is a powerful tool, with extensive options that allow you to create the perfect event. Let’s have a look at some of the most important ones:

Your dashboard

Once you’ve started your first event you will get access to your Dashboard. Here you will see an aggregate of all your ticket sales and registrations, once they start happening.

If you don’t have any events the first thing you should do is click on “Create event”

dashboard

How to start event registration: Your new event

Now, let’s move on to creating an actual event. You can either click on the button My events and you will be taken to the Event Management chart or you can click on Create an Event button and this will take you to the core part of Oveit.

myevents

You’ll see that creating an event is extremely easy. You have 4 main steps and two other ones in case you want to use two additional functions: Registration forms and Badge design (these are more advanced topics on how to start event registration).

How to start event registration steps

The first step is entitled General Settings. Here you set up general details on your event, things such as the event’s name, start and end date and where it takes place. By the way – if you host a virtual event – just add “Virtual” or “Online” in the Location/address input.

There’s several other things you can fill in. An example would be “No seating”. This means you will not have a seating map. If you need a seating map just choose “With seating” and find out here how to set up a seating chart.

You will need to add a start and end date for your event. If you’re selling tickets for a venue, such as a theme park that sells tickets all year round, just tick “Perpetual”. This will allow visitors to buy tickets whenever they feel like visiting you.

There’s several other more advanced features, such as registration forms or badges. If you need these, be sure to book a guided tour of these features.

Adding tickets to my event registration

Next steps on how to start event registration guide: tickets.

You can split the types of event registrations you will accept with different types of tickets. Oveit allows all sorts of discounts and addons with your ticket but you only need to know one thing. At its basics you will just need to add one ticket, free or paid and click “Save”. This takes you to a list where you can add more tickets by clicking “New ticket category”

How to start event registration by setting up free events
How to start event registration – adding tickets

Sometimes you may need a more advanced ticketing setup when you start event registration. If so – check out our post on advanced ticket types or contact us for a guided tour or more advanced features and benefits.

How to start event registration: checkout settings

checkout-page
Checkout settings – default options are usually left unchanged

There’s a lot of options on this page. Please don’t get confused. We’ve set up the page in such a way that our default check marks do the work for you. You can contact us if you need a more in-depth explanation or more advanced configuration.

Usually, what you want to customise is the follow up email subject and content. Basically your message to your future visitors:

Confirmation email on event registration

This is where you customise what your visitors will receive in their email after they registered.

Above you can see a chart with variables and their description. The computer-code looking things are tags you can use to personalise the email content. For example: if you’re holding a virtual event you can add [tickets_codes] in the email body to display the registration code your guests will use to access your virtual event.

Finally, you have the order confirmation page. Here you can opt to send a Thank you message that will be displayed after the customer has purchased the ticket or you can send him to a custom created URL on your website. To do that, just add the link and all is done.

How to preview your event registration

The final event registration setup step is the Preview section below:

How to start event registration and customise layout

Step no. 4 allows you to preview your registration widget prior to publishing it. You can play around with colors and fonts and brand the event registration according to your wishes.

Hit publish when you are ready to start registration and you will be taken to…

Payment processor integration

If you haven’t done so already, this is where you connect your payment processor. This is usually PayPal or Stripe. This way we can help you receive payments instantly. It’s very, very simple:

  • If you use PayPal: press Activate PayPal integration: In the next step you will add your PayPal email address and name. This helps Oveit to know where to send funds paid by your customers.
  • If you use Stripe: press “Activate Stripe integration”. This takes you to your Stripe account where you can check whether you want to safely accept payments with Oveit.

All of our transactions are handled by our partners (e.g. PayPal and Stripe). Your money or your customers payment data is never stored with us.

If you haven’t done so already, you will need to fill in your billing information. As you sell directly to your visitors, they will need to know who they’re buying from. Oveit issues invoices for all purchases on your behalf. Here’s what you need to fill in, only once, as you start selling:

If this is a bit too complicated when you start your event, just reach out to us and let’s set up a call where we can guide you through the setup process, step by step. One of our customer success staff will help you get everything set up.

Final step: Copy, paste and embed your event in your website

The last step: start your event registration. All you have to do now is get the event on your website and make it available to customers or point them to your event registration on Oveit. To do that, click on ‘My events’ in the bar, right near the Oveit logo. You will see a list of your events. You can start your registration in two ways:

  1. Point visitors to your event registration page on Oveit. Click the “Preview” link and share the URL with your visitors on social media or your website.
  2. Embed the registration on your website: you will notice that every event has an “</> Embed” button below it. Click on that button and you’ll find two embed codes (one available for light theme and one for dark theme – the theme refers to your website visual theme). Just copy the code you need and paste it on your website. The embed is responsive and works with most website management software so you won’t have any problems putting it on your website in just a couple of seconds.
embed

And that’s it! You managed to start your event registration and start receiving event registrations. Now visitors can register, purchase tickets and attend your in-person or virtual event.

How to add advanced ticket types to an event

With Oveit you can create advanced Ticket types. The first thing you do is set your ticket type name. You can set names such as VIP Area, Entry ticket, Early bird ticket etc. Obviously, the ticket type name is your choice and varies according to the events. You might want to create special prices for different areas in your venue, so you can name one ticket type Area A and another Area B. Again, this is your choice to make.

tickets

Now, you can make a short description of the ticket (300 characters). Here you can add information about the ticket that might be relevant to the attendee. This is optional but sometimes it’s a good thing to have, as you might want to offer the attendee some extra features on that respective ticket. Or it may be a multiple day pass for a larger event and the description can indicate the events where he is allowed to participate.

Advanced ticket types - new ticket

Next is the ticket price. You can set up the ticket price in USD or other, local currencies. Nevertheless, if you enter the ticket price “0”, that means the event is free of charge and you can go on using Oveit just as a registration tool for the attendees.

After you set up the price, you can tick an option to include the sales fees in the final price, or opt to add it to your ticket price. You will see the buyer’s final price (and our fee) and you will see how much you will receive in the end.

You will see a Bulk sales options bar. This is a nice feature in case you want to create special offers for a specific ticket category. Let’s say that your ticket price is 20 USD. Now, you can make a special offer and sell 2 tickets for the price of one. Just select: 2 tickets cost 20 USD. And the offer is active. Simple and fast. Of course you can include our processing fee in the price or add it, just like in the case of normal tickets. And you can also add more promotions: 5 tickets cost X USD, 10 tickets cost X USD… and all the way to 15 tickets. If you want to remove a bulk sales offer just click delete and you’re done.

Next you can set up the timetable of the sales for this ticket type. Set the starting date and hour for the ticket sales and set the closing date and hour. If you want to sell this type of ticket until the event day, just leave the fields empty and Oveit will set it up automatically.

You can customise your event ticketing process by setting specific Series and Numbers for the tickets, if you wish to do so. Otherwise, just let Oveit work its magic and generate the ticket ID’s automatically. Save the ticket and proceed. You can add more tickets, edit your created tickets and associate the tickets with the event venue.

If you’ve previously set up a venue seating chart, you can associate the tickets you’ve just created with a certain seating section, row or seat. Once you click on the Associate Tickets you will be taken to a new window where you will see the seating chart of the venue that you’ve previously created.  To associate tickets with seats is extremely simple. Just click on the ticket type and then click on the seat section… and that’s it. If you want to block some areas of the seating chart, just click on ‘Unassociated’ and then on the respective area, and it’s blocked. You can do that while sales are going on, as you might want to change ticket prices or you might want to assign some seats to other categories or even give invitations/vouchers for those seats. So with just a couple of clicks you can do your seat management on the fly with this Assign seats function.

That’s it. How are you going to use the advanced ticket types?

Everything you need to know about hosting a Virtual Wine Tasting

There is no doubt that we all miss our normal lives and activities. A year into the pandemic and most of us still live under imposed restrictions. Well, the good news is that part of our in-person activities which are put on pause as we speak can be replicated in a virtual environment, even when we talk about a virtual wine tasting.

In this post, we’re going to place the focus on virtual wine tastings. The end result replicates really well in-person wine tastings but setting up such an experience is slightly different. For those that would rather experience new wines from the comfort of their own homes, a virtual wine tasting can be a great alternative.

If you are thinking to host a virtual wine tasting, here are some tips that will help you create a memorable experience. 

What is a Virtual Wine Tasting?

Before diving into what it takes to host a virtual wine tasting, let’s begin by briefly describing this relatively new concept. Well, you can think of it as a regular wine tasting (in-person), where participants taste and learn about different wine selections from a winery. While the purpose of both in-person and virtual wine tastings is the same, the main difference lies in how this action is performed. Instead of visiting a winery, the winery comes to your door. In both cases, wineries take care of the whole experience. Their duty is to coordinate the wine shipment, making sure that it arrives at your location in time. Then, organizers will share further details on how to access the virtual wine tasting, including platform capabilities for a better experience. 

Date & Time for your Virtual Wine Tasting

Well, instead of deciding a date & time yourself, provide your audience with the option to do it themselves. To avoid the back and forth texting to find out when everyone’s free, consider using a tool such as Pick. This app integrates with Gmail and Office 365. It simply shows those times when everyone is available. Based on that, you can choose a date & time that hopefully works for everybody that’s interested to attend.

Provide clear tasting instructions ahead of time

To make sure that your wines are enjoyed properly by your audience, provide clear instructions on how the virtual tasting should be approached. When is the right time for your guests to open their wine bottles? Should they preserve the wines at a certain temperature? What about using a clean glass for each wine? Should they taste the wines in a specific order? 

This might seem like a basic piece of information, but communicating it ahead of time can only make you look more organized and professional. If you ship wine kits before the actual virtual wine tasting, it might be a good idea to include those instructions in there. 

Choose a tasting theme

It’s always recommended to decide upon a theme beforehand. In the case of virtual wine testings, a theme translates into deciding on particular wines to taste. These are some common themes when it comes to wine-tasting:

  • Regional

A regional wine tasting theme brings together wines from a particular region. For instance, no other wines are allowed besides those coming from the Veneto region of Italy or any other region.

  • Vertical

A vertical tasting requires a bit more effort since it includes the wine of a producer across a range of years. The key element for a proper vertical tasting is to assure that the wine bottles were stored properly. However, if you manage to put together this type of tasting, the outcome can be great, since your audience can learn about a winemaker’s style, getting familiar with the various vintage styles and how those changed during the years. 

  • Horizontal

This is a common theme for both virtual and in-person wine tastings. It involves wines that are produced in the same year, from different producers. It gives more flexibility since all new releases can be included. 

  • Blind Tasting

This one works best when comparing different types of grapes, like Pinot Grigio, Shiraz, Chardonnay, or Pinot Noir. It can be used as an ice breaker for virtual wine tastings with many participants. The wine labels are covered and participants need to guess the country, grape, and even the price range based on the taste of wine. 

Photo by David Bartus from Pexels

Think of your setting in advance

As the virtual wine tasting host, make sure to choose a setting without distractions. If you go live from your home, tidy up in advance. Run some tests in advance and check your internet connection, camera, and microphone. If you have the option to host the virtual wine tasting inside an actual winery, good for you. That will only make things more fun for your audience. You can surprise them with a virtual tour of the winery before the actual tasting begins, sharing with them your favorite parts of it. 

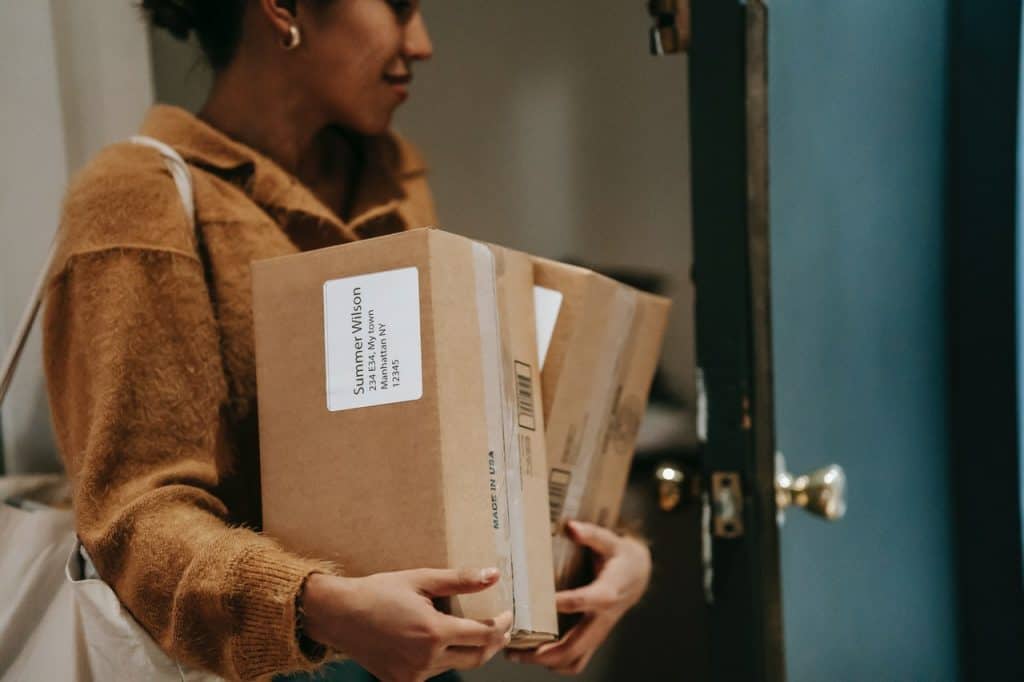
Custom shipments for your audience

Why not create special packages for your audience? An in-person wine tasting takes care of all the necessary supplies. To make it easier, enable your audience to order their wine supplies in advance. Inside each package, you can include different wines to be tested, food pairings, and maybe some wine glasses as well. 

To present the available packages more engaging instead of simply posting them on your website, why not create a live shopping session? For instance, with Streams.live, our live stream shopping and virtual event software, creating a live shopping session is as easy as possible. It allows your viewers to purchase different promoted packages, straight from the video. The tool comes with a chat & questions feature, creating engagement and allowing you as the presenter to answer incoming questions in real-time when it matters the most. 

Photo by Liza Summer from Pexels

Decide upon a platform

Well, you’ve taken care of all the small details. Now it’s time to choose your technology. This might be the most important step of the process when hosting a virtual wine tasting. In the end, this is where your audience will interact, exchange thoughts, and experience all the hard work that you’ve put in. 

A large number of virtual wine tastings take place on Zoom. It is indeed a reliable and user-friendly video conferencing tool. However, if you want to go that extra mile and create a more personalized experience, closer to your brand and believes, you might consider as well Oveit and Streams.live. Our solutions are interconnected. Oveit is our event registration software, that allows you to register attendees, customize confirmation emails, send out electronic tickets with unique access codes, collect valuable information through fully customizable registration forms and receive direct payments into your account once an order is placed. 

In summary

Who said that in-person wine tastings can’t be replicated in a virtual environment? Social distancing doesn’t exist in the online world and opportunities are limitless. As physical locations, including wineries, remain closed due to the pandemic, events such as virtual wine tastings are a great way to keep a business alive. It is a new way of interacting for all of us, so don’t be afraid to try it out. It won’t be perfect from your first try, which is absolutely normal. One last piece of advice is to always ask for feedback. Your audience is in the right position to provide you with constructive feedback after each virtual wine tasting. 

Stay safe. And cheers!